Countertop appliance cleaning: removable parts, traps, coatings and dishwasher claims
Cleaning convenience is a design property, not a badge on the box. Map every food-contact surface, removable part, seal and liquid path. Read the exact manual, check whether parts fit your sink or dishwasher, and confirm that replacements remain available before buying.
In this guide
Count the cleaning sequence, not just the removable parts
A strong design lets you disconnect safely, remove food-contact parts without tools, reach residues, clean them by a permitted method, dry them fully and reassemble without trapping a seal. “Dishwasher-safe” must identify which parts, rack, programme and temperature. Self-cleaning or rinse modes do not replace inspection, and an inaccessible motor-side crevice can outweigh a convenient bowl.
Start with the food and liquid path
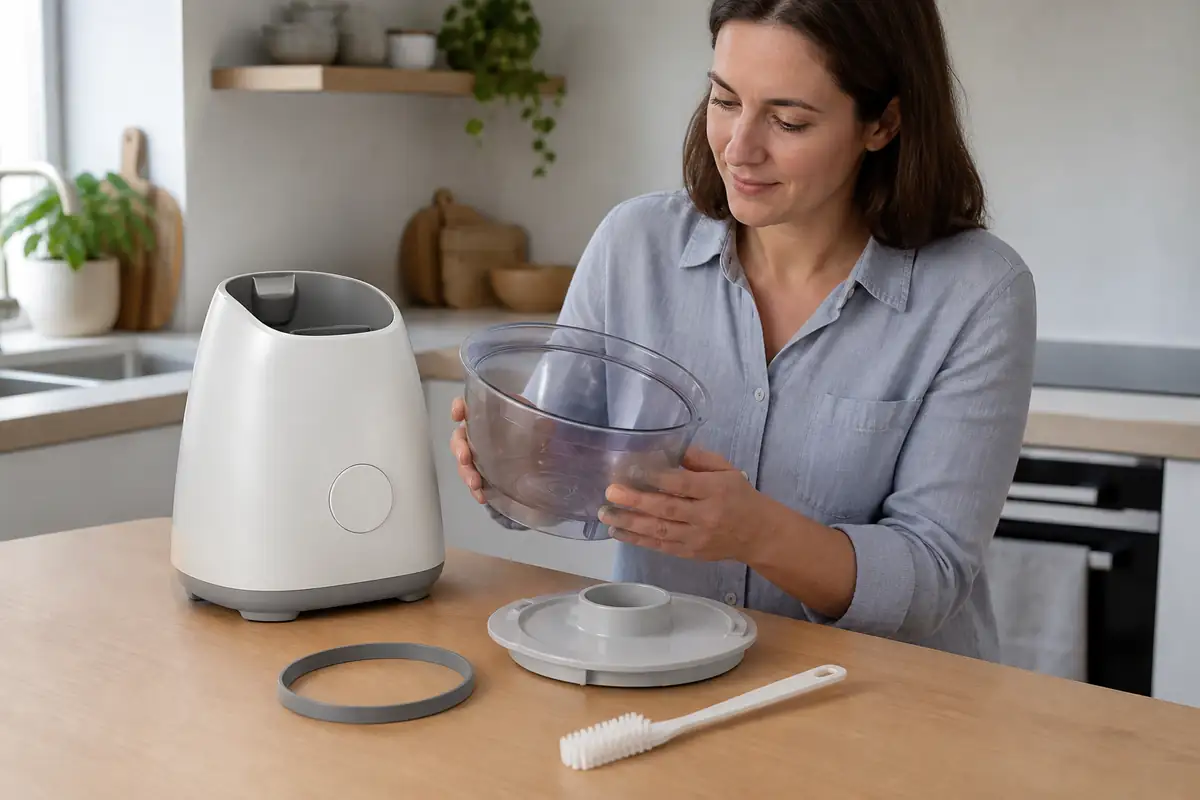
Trace ingredients from entry to finished food. A blender has a lid, jug, blade area, gasket and coupling. A processor adds feed tube, pusher, spindle and discs. A grill may have plates, channels, hinges and drip tray. A coffee machine can involve water tank, brew path, milk components and waste container. The number of parts matters less than whether each contaminated zone can be reached safely.
Product photography often shows the attractive exterior rather than the underside of a lid or seal groove. Download the manual before purchase. The manual-before-buying guide explains how instructions expose tasks omitted from a feature list.
| Design feature | Useful evidence | Hidden burden | Pass question |
|---|---|---|---|
| Removable bowl or jug | Tool-free release and clear diagrams | Heavy, tall or awkward in the sink | Can it be held safely when wet? |
| Removable seal | Named removal and refitting method | Easy to lose, stretch or trap | Is a genuine replacement listed? |
| Dishwasher-safe part | Exact rack and cycle instructions | Coating wear, poor fit or retained water | Does it fit your real machine? |
| Rinse or self-clean mode | Specific sequence and limitations | Cannot inspect every crevice | What manual cleaning remains? |
List parts before judging convenience
Use an exploded diagram or parts list. Count bowl, lid, gasket, blade, shaft, tray, screen, filter, valve, tool and splashguard separately. Identify sharp, hot, heavy and fragile pieces. A dishwasher-safe lid is little help when its non-removable seal traps residue or when the blade assembly must be hand-washed immediately.
Compare tasks as well as machines. The blender versus food-processor guide shows how attachment count can return preparation time as washing. The stand-mixer guide covers bowls, beaters and splashguards, while the microwave guide highlights ceiling elements, turntables and vents.
Manual evidence to capture
- Safe isolation, cooling and disassembly order.
- Parts permitted in water or a dishwasher, with rack and programme.
- Surfaces that must only be wiped and kept away from liquid.
- Sharp-blade handling, hot-surface and electrical warnings.
- Descaling, filter, seal or lubrication schedule where applicable.
- Drying and reassembly instructions plus replacement-part references.
Test physical fit without using the appliance
Record the largest removable dimension and compare it with sink width, tap clearance, draining rack and dishwasher basket. A tall jug may not stand beneath a low tap. A wide air-fryer drawer can consume most of a sink. A glass bowl may be manageable dry and precarious when hot, greasy and full.
Check storage for loose sharp tools. Discs and blades need protected placement, not a drawer where hands search blindly. Measure assembled height and the space needed to lift lids. The toaster guide uses a similar principle for crumb-tray access and wall clearance: a removable part is only useful when the kitchen can remove it.
Read “dishwasher-safe” narrowly
The claim may apply to a bowl but not its blade, seal, lid or coated accessory. Top-rack-only and lower-temperature instructions matter. A part can technically survive a dishwasher yet retain water in a double wall, occupy half a rack or lose clarity and surface finish over repeated cycles.
Follow the manufacturer rather than a universal rule. Do not place a motor base, cable, plug or prohibited assembly in water. Hand washing may be required for sharp edges, non-stick coatings, aluminium finishes, wooden tools or seals. Abrasive pads and strong cleaners can damage surfaces even when residue is stubborn.
Inspect traps, seals and interfaces
Look under lid rims, around shafts, inside handles, behind splashguards and at the junction between removable and fixed parts. A narrow groove should have a stated cleaning method. If a seal is user-removable, ask how it is oriented and whether an incorrectly fitted seal can leak. If it is fixed, determine how the channel is flushed and dried.
Transparent parts aid inspection but can scratch or cloud. Dark opaque components hide staining. Neither proves hygiene. The useful question is whether normal cleaning leaves the surface visibly and physically accessible without unsafe dismantling.
Separate routine cleaning from maintenance
Routine cleaning follows each use; maintenance may include descaling, filter cleaning, seal inspection or replacement. Record intervals as conditions, not promises: hard water, oily foods and frequency change need. A reminder light does not determine whether the task is easy.
Check availability and price of genuine user-replaceable parts. The appliance repairability guide explains how a missing jug or gasket can retire an otherwise sound motor. Include consumables and maintenance in the total-cost calculation.
Consider coatings and material transitions
Non-stick surfaces can simplify release but need permitted utensils and cleaning. Stainless steel is inspectable but can show marks. Glass is inert and visible but heavy and breakable. Plastic can be light yet scratch or retain staining depending on material and use. Marketing material names do not prove durability.
Inspect where materials join, because seams, rivets, lips and overmoulded edges can catch food. Ask whether discolouration is cosmetic or a replacement condition. Never use a damaged food-contact coating or cracked vessel contrary to instructions. Obtain the correct part rather than improvising liners, seals or adhesives that could affect heat, airflow or interlocks.
Do not mistake easy cleaning for food-safety proof
A clean-looking appliance can still be handled badly, and an awkward one can be maintained with discipline. Follow food-specific time and temperature guidance, prevent cross-contamination and clean with suitable products according to their labels. This article compares design and ownership effort; it does not validate a sanitation process.
Unplug and cool as instructed. Keep water away from electrical components. Do not bypass interlocks to expose a moving blade, and do not reach into a machine merely because the control is off. If the manual is ambiguous about safe access, choose a clearer design.
Make drying part of the comparison
Cleaning is not finished when a part leaves the water. Hollow handles, lid channels, filters and double-wall pieces can retain moisture. Check whether components can stand securely with airflow, whether a seal must be removed for drying and whether the appliance can remain disassembled without becoming unstable. Reassembling damp parts or closing a wet storage cavity can create odour and residue problems.
Allocate drying space before buying. A small kitchen may handle one bowl easily but not a wide tray, lid and several attachments spread across the worktop. The best design returns to a clean dry ready state without unsafe stacking or towels pushed into inaccessible electrical interfaces.
Choose the appliance when
- Every food-contact zone has a clear permitted cleaning route.
- Wet, sharp and hot parts are manageable in your kitchen.
- Dishwasher claims are exact and practical.
- Seals, jugs and filters have identifiable replacements.
Reject or reconsider when
- The manual is missing or vague about disassembly.
- Residue traps require unsafe improvised access.
- Large parts do not fit your sink, rack or storage.
- A small unavailable part could disable the whole appliance.
Run a paper rehearsal
Before buying, choose one typical recipe and write the complete sequence: setup, preparation, processing, emptying, cooling, disassembly, scraping, washing, rinsing, drying, reassembly and storage. Time is not the only issue; count hand-offs involving sharp, hot or heavy parts. Compare this sequence with the alternative tool already owned.
A new appliance should solve more work than it creates. If its function duplicates a pan, oven or existing processor, cleaning and storage can erase convenience. The right decision may be a simpler device with fewer modes and clearer parts support.
Balanced verdict
Cleanability should be verified from the manual and your kitchen dimensions before performance features are compared. Removable parts, precise dishwasher instructions, inspectable seals and obtainable replacements are stronger evidence than “easy clean” copy.
Choose a design whose dirtiest task remains safe and realistic on a tired weekday. A machine used often and cleaned correctly is better value than a feature-rich appliance avoided because its hidden crevices and awkward parts make every use a project.
Official sources
Frequently asked questions
Does dishwasher-safe mean every part can go in?
No. Check the exact part, rack, programme and temperature in the manual. Motor bases and many assemblies must remain dry.
Is a self-clean programme enough?
Usually not on its own. It may loosen residue, but the manual should identify remaining inspection, disassembly and cleaning.
Should seals be removed after every use?
Only as directed. Unnecessary removal can stretch or misfit a seal; leaving a removable dirty seal in place can also cause problems.
Is stainless steel always easier to clean?
No. It is inspectable and durable in many uses, but geometry, finish, seams and permitted cleaners matter more than the name alone.
Can I use an appliance if its non-stick coating is damaged?
Follow the manufacturer and stop if the instructions require replacement. Do not improvise a coating repair or liner.
What spare part should I check first?
Check the failure-prone part that makes the appliance unusable: often a jug, bowl, lid, seal, filter, blade assembly or basket.
How we researched this guide
Recommended Today reviewed UK food-hygiene and product-safety information and compared the instruction structure used for blenders, processors, mixers, microwaves and toasters. We assessed cleanability as a sequence of access, permitted method, drying, reassembly and parts support.
Limitations
We did not clean or test a specific appliance. Designs, materials and instructions vary; recheck the exact manual, parts catalogue, price and stock before purchase. The image is an editorial illustration, not a photograph from a product test.