Gallery wall planning: spacing, alignment and paper templates
A successful gallery wall is designed as one composition, not a series of holes. Measure the true outside edge of every frame, choose a single alignment rule, cut full-size paper templates and test the complete footprint against furniture, switches, curtains and normal sightlines before fixing anything.
In this guide
Build the arrangement in paper, then transfer each real hanging point
Use the frames’ outer dimensions, not print sizes, and start from an anchor frame or overall centreline. Keep one deliberate gap family, photograph the paper layout, then calculate each hook from the actual cord, D-ring or rail. Do not copy an online gallery arrangement without adapting it to your wall and load.
This is a planning guide, not structural advice. Recommended Today did not inspect your wall, frame hardware, hidden services or artwork. Use the fixing and frame manufacturers’ instructions and seek competent help for uncertain, heavy or valuable installations.
The decisions to make before arranging
| Decision | Question | Record |
|---|---|---|
| Boundary | What maximum wall rectangle is genuinely available? | Width, height, obstructions and furniture |
| Anchor | What controls the composition? | Centreline, top edge, furniture or key frame |
| Gap | How will spacing feel consistent? | One base gap and limited intentional variations |
| Balance | Where are visual weight and colour concentrated? | Large, dark, detailed and portrait pieces |
| Hardware | How does each frame actually hang? | Cord, D-rings, sawtooth, cleat or rail |
| Wall | What fixing and load are appropriate? | Construction, loaded weight and hidden services |
Define the wall boundary
Measure the usable wall, then subtract space required by doors, curtains, radiators, switches, sockets and furniture. Check how the room is seen from its usual entry and seating position. A mathematically centred group can look wrong if it ignores a sofa, sideboard or architectural centreline.
Treat the gallery as one outer rectangle. Compare that footprint with the furniture below it rather than positioning every frame independently. Leave enough visual breathing room that the group does not collide with the ceiling or furniture, but avoid applying a universal internet height. People, rooms and furniture differ.
Boundary checklist
- Wall width and height in millimetres.
- Top of furniture and its true width.
- Door, curtain and cupboard swing.
- Switches, sockets, thermostat and vents.
- Normal seated and standing sightlines.
- Known or suspected pipes, cables and studs.
For frame dimensions, mounts and aspect ratios, use the separate picture-frame size guide. Use this guide to arrange the frames and transfer the layout to the wall.
Choose one alignment rule
A grid aligns rows and columns. A salon arrangement is more varied but still needs an invisible logic: a centreline, a strong central frame, or shared outer boundary. A linear row can follow furniture or a corridor. Mixing all three without a hierarchy creates drift.
| Layout | Strength | Main risk |
|---|---|---|
| Strict grid | Calm and easy to extend with identical frames | Small errors become obvious |
| Central anchor | Handles mixed sizes with a clear focal point | Outer edges can become ragged |
| Shared top or bottom | Works above furniture and in corridors | Different frame weights can feel unbalanced |
| Salon cluster | Flexible and characterful | Needs paper planning to avoid random gaps |
| Picture ledge | Allows rearrangement without new holes | Requires secure ledge fixing and depth clearance |
Pick the rule before choosing the final order. If the collection will grow, leave a deliberate expansion edge or use a ledge. Do not centre today’s incomplete group if tomorrow’s addition will force every fixing to move.
Spacing: consistency beats one perfect number
There is no mandatory gallery-wall gap. Smaller frames usually tolerate tighter spacing; large frames need more air. The important point is that adjacent gaps read as related. Choose a base gap using cardboard spacers or a cut strip, then allow only purposeful changes.
Measure edge to edge, not from hanging points. Wide mouldings and narrow mouldings can make equal centre-to-centre spacing look uneven. For a grid, identical outer frame dimensions are much easier than identical print sizes.
Diagnose awkward spacing
- A narrow vertical channel can split the group in two.
- A large void near the centre competes with the artwork.
- Tight corners make frames look accidentally touching.
- Even gaps can still feel uneven when dark pieces cluster.
- Very different moulding widths change perceived spacing.
- A paper test reveals these problems before drilling.
Make full-size paper templates
Trace or measure every frame’s true outer edge onto inexpensive paper. Label each template on the front with a private code, orientation, weight and hardware type; avoid displaying personal information. Mark the exact hanging point measured from the frame top and side.
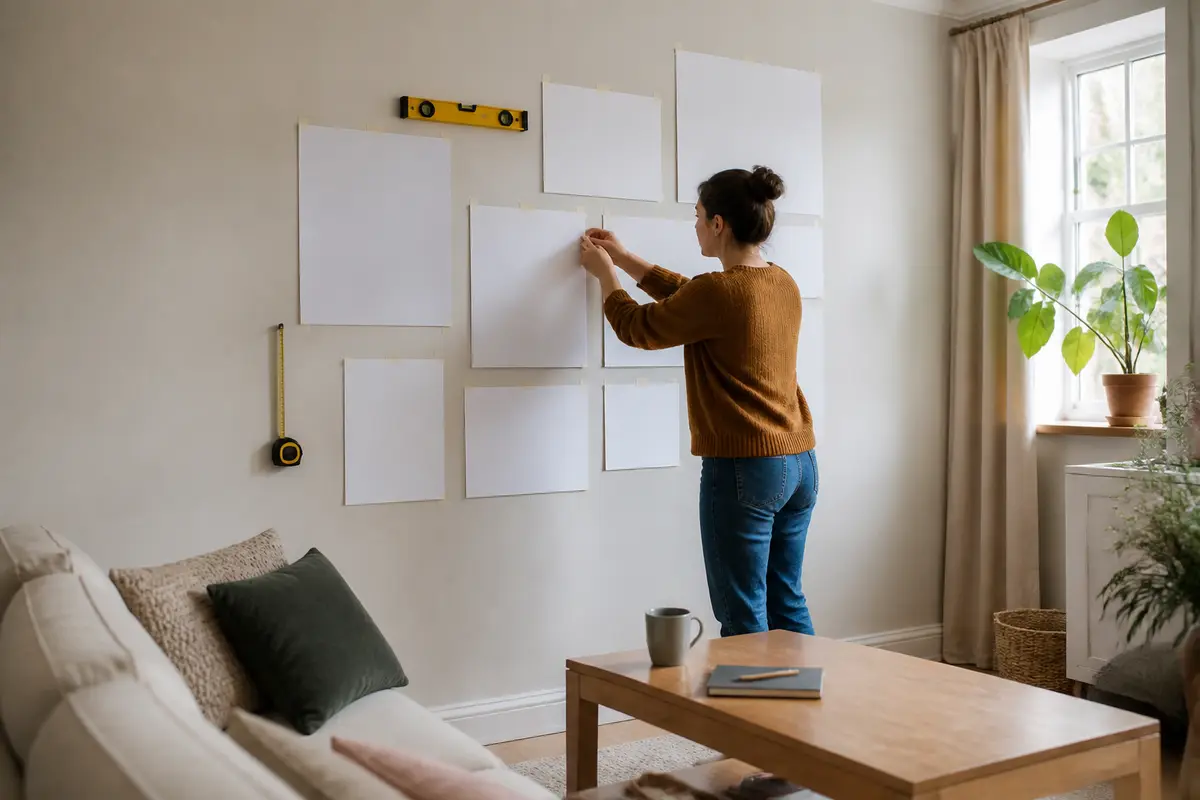
Lay templates on the floor first, photograph promising arrangements from directly above, then transfer the best version to the wall with removable tape suitable for the surface. Paper is lighter than frames and easier to move, but tape can still lift fragile paint or wallpaper—test discreetly and follow the tape maker’s instructions.
Template workflow
- Cut every sheet to the real outer frame size.
- Draw the top edge and orientation clearly.
- Mark the hardware position, not an estimated centre.
- Use a measured spacer between neighbouring sheets.
- View from room entrances and normal seats.
- Leave the layout for a day before approving holes.
Balance scale, colour and subject
Visual weight comes from more than dimensions. A dark high-contrast image can feel heavier than a larger pale one; a portrait or strong face draws attention; a thick frame carries more mass. Distribute these forces around the anchor instead of placing every dominant piece on one side.
Variety works when something repeats: frame finish, mount colour, subject family or gap rhythm. Perfectly matching everything can look formal; mixing without repetition can look accidental. Choose one or two recurring elements and let the artwork provide variation.
If buying frames as a gift or building around family photographs, preserve flexibility. The gift-choice guide helps avoid over-personalising, while the product-shortlisting guide keeps frame finishes coherent.
Transfer from paper to hardware
A template edge locates the frame; it does not automatically locate the hook. Turn over the real frame, tension its cord as it will hang, and measure from the top edge to the loaded cord peak. For D-rings or cleats, measure both horizontal and vertical offsets. Transfer those values to the paper before drilling.
Use a spirit level for the anchor and critical shared lines. Work outward, checking after each frame rather than drilling every hole from theoretical measurements. Manufacturing tolerances and hardware placement vary.
Fixings and safety
Identify wall construction and loaded frame weight. Glass, mounts, artwork and backing all add mass. Match the fixing to plasterboard, masonry, timber or the actual substrate, following manufacturer limits. Adhesive products depend on surface, paint condition, environment and load.
Stop before fixing if…
- You do not know the wall construction.
- The route may contain cables, pipes or services.
- A heavy glazed frame will hang above a bed or cot.
- The hardware is damaged or poorly attached.
- The stated load limit is missing or marginal.
- The artwork is valuable enough to need professional installation.
For broader measurement and movement checks, see our furniture measuring guide. It reinforces the same rule: a paper footprint should reflect the complete object, not a catalogue shorthand.
If a ledge, shelf or unusually heavy frame forms part of the plan, apply the material and joint questions in our furniture quality guide before relying on appearance alone.
Plan for changing the arrangement
Take a straight-on photograph and save measurements before removing templates. Keep spare matching hooks and record paint colour for future repairs. When adding a new piece, return to the overall boundary and balance rather than filling the first visible gap.
A ledge or rail can reduce repeated wall holes and accommodate seasonal changes, but it becomes its own structural installation. Check depth, load and tipping risk, particularly in circulation spaces or homes with children.
Who should choose which layout?
Choose a grid if…
- You have matching outer frame sizes.
- The room benefits from calm repetition.
- Precise shared lines are practical to achieve.
- The collection is stable rather than constantly growing.
Choose an anchored cluster if…
- Frame sizes and orientations vary.
- One piece can provide a clear focal point.
- You will test the whole arrangement in paper.
- Repeated gaps or finishes provide cohesion.
Our verdict
The paper-template stage is the quality control for a gallery wall. It exposes scale, spacing and balance problems while every change is reversible. Use real outer dimensions, one alignment rule and an anchor related to the room.
Then treat hanging points and fixings as engineering rather than decoration. Measure each actual frame, confirm wall and load, and install incrementally. A modest composition placed carefully will look more deliberate than a larger collection copied from a photograph.
More layout, framing and gift-presentation guidance is collected in the Style & Gifts section.
Check current official information:
Electrical Safety First home guidance ↗HSE electrical safety guidance ↗
Frequently asked questions
What gap should a gallery wall have?
There is no universal figure. Choose a gap proportional to the frames and apply it consistently, using a physical spacer and paper templates.
Should a gallery wall align to the sofa or wall?
Usually relate it to the strongest visual anchor, often the furniture below, while checking the wider wall and room sightlines.
How do I mix different frame sizes?
Choose a central anchor or shared boundary, repeat a gap or finish, and distribute visual weight rather than sorting only by dimensions.
How do I mark hook positions?
Measure the actual tensioned cord, D-rings or cleat from the frame edges and transfer those offsets to each paper template.
Can I use adhesive strips?
Only when the product, wall surface, environment, hardware and complete loaded weight fit the manufacturer’s limits.
How can I add frames later?
Plan an expansion edge, use a ledge or retain the original boundary measurements and paper-template photograph before adding anything.
How we developed this gallery-wall method
We separated composition decisions from frame sizing and structural fixing, then built a repeatable boundary–anchor–gap–template–hardware sequence. Supporting internal guides cover frame dimensions, product shortlisting, furniture measurements and gift flexibility.
Limitations
Rooms, walls, fixings, frames and artwork vary. We did not inspect hidden services, substrate or load. This guide cannot approve a fixing or conservation method.