Mechanical keyboard care guide: keycap wear, cleaning, switches and repairability
Mechanical construction can make a keyboard serviceable when you identify removable parts, record the layout and diagnose one layer at a time. Clean and repair only within the exact design.
In this guide
Disconnect first and change one variable at a time
Photograph the layout, follow the exact manual, remove only supported parts and test keys with a repeatable text-free tool or local key tester. A mechanical switch does not make the board universally hot-swappable, washable or safe to dismantle.
Use the mechanical-keyboard buying guide for selection and the keyboard layout guide before changing keycaps. This page covers ownership: cleaning, wear, fault isolation and repair evidence.
| Symptom | Controlled first check | Likely layer | Avoid |
|---|---|---|---|
| Sticky or slow key | Disconnect, inspect debris and compare adjacent keys | Keycap, stabiliser, switch or spill | Flooding with solvent |
| One key does not register | Test another device or profile and record behaviour | Mapping, socket, switch, solder or PCB | Replacing random switches first |
| Legend or surface worn | Photograph and identify cap material and profile | Keycap cosmetic wear | Assuming the switch is failing |
| Intermittent disconnect | Test direct port, known cable and unchanged settings | Cable, connector, power or firmware | Opening the case before preserving evidence |
Keyboard ownership record
- Exact model, revision, layout and connection mode.
- Photograph of the complete key layout.
- Official manual, firmware and support page.
- Keycap profile, material and supported pull method.
- Whether switches are soldered or genuinely hot-swappable.
- Cleaning dates and products permitted by the maker.
- Fault map with keys, frequency and test conditions.
- Spare-part, warranty and repair-route information.
Identify what is actually serviceable
Record the model and hardware revision. Mechanical describes the switch mechanism, not the repair architecture. One board may have soldered switches, another hot-swap sockets, and a third an optical design with incompatible parts. Keycaps can also use different stems, profiles, stabilisers and low-profile retention systems.
Read the maker’s manual before pulling anything. Use the specification guide to verify claims such as hot-swap, replaceable cable and supported switch family. A seller title saying “custom” or “mechanical” is not permission to open the case.
Photograph and map the layout
Take a straight overhead photograph before removing caps, then close-ups of large stabilised keys and any unusual rows. Record operating-system layout, firmware layer, remaps and macro software. A physical cap in the wrong position can look like an electronic mapping fault after reassembly.
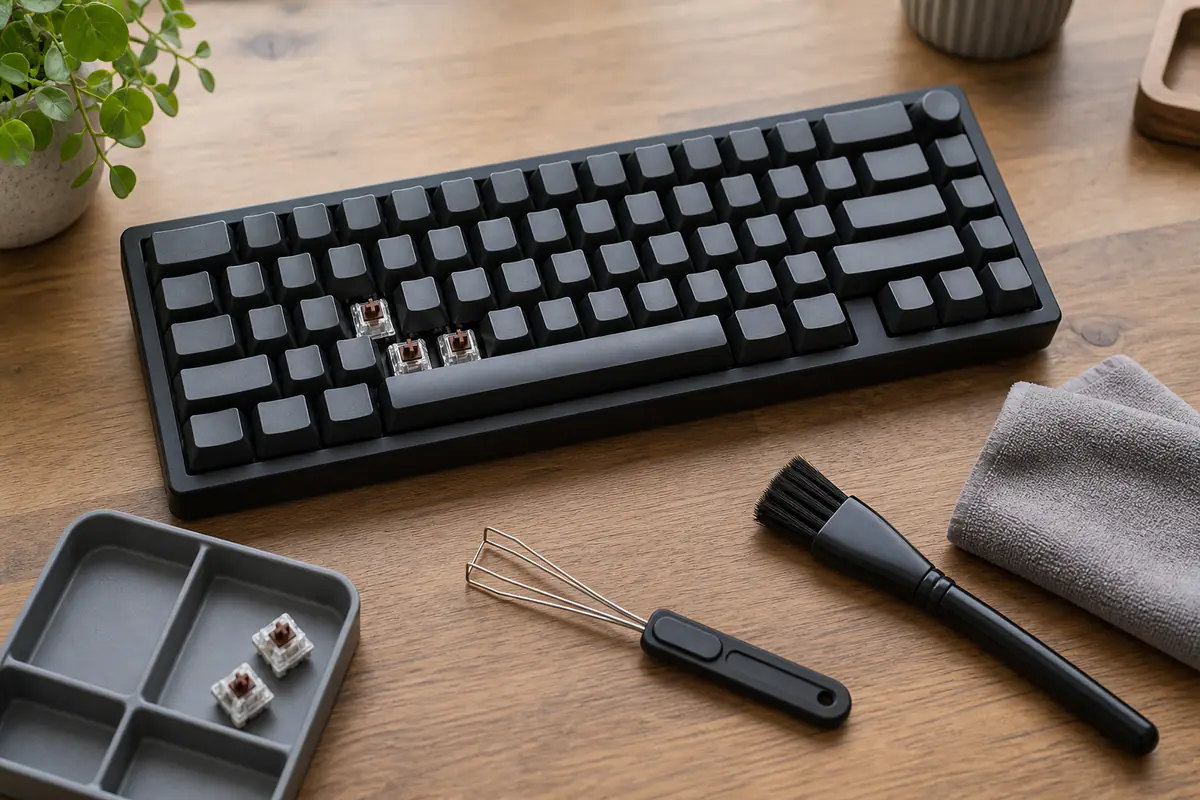
Sort removed caps by row and location in a compartment tray. Profiles can change height or angle between rows even when the top shape looks similar. Do not rely only on legends, especially with blank, alternate-language or novelty sets. Preserve a map offline so a reset does not erase the only record.
Disconnect power and remove batteries where supported
Unplug the cable, switch wireless modes off and remove user-removable batteries only if the manual instructs it. Do not clean while the board charges. Move drinks and loose metal tools away, work on a stable dry surface and discharge obvious static according to maker guidance before touching supported internal modules.
Microsoft’s keyboard cleaning guidance says to disconnect the device or remove batteries before cleaning and not apply liquid directly. That general principle does not override a stricter keyboard manual. If a spill has entered a powered board, disconnect safely and seek model-specific support rather than pressing keys to see whether it survived.
Remove loose debris without driving it deeper
With the device disconnected, hold or angle it only as the construction safely allows and use gentle tapping, a soft brush or controlled air method permitted by the maker. Keep canned air upright and at the specified distance if used. Avoid overspeeding a fan or spraying propellant into switches.
A vacuum can create static or pull loose parts; use it only if the maker permits an appropriate low-risk method. Work from the surface outward and collect debris rather than pushing it beneath the plate. Photograph unexpected metal fragments, corrosion or sticky residue before further cleaning.
Clean keycaps by material and legend method
Check whether caps are ABS, PBT, coated, painted, pad-printed, laser-marked, double-shot or another construction. A chemical tolerated by one material can cloud another or remove legends. For routine surface cleaning, apply only maker-approved solution to a soft lint-free cloth, never directly to the keyboard.
If caps are removable and washable under exact instructions, separate them from the board and let them dry fully before refitting. Do not use a dishwasher, hot water, bleach or aggressive alcohol without explicit support. Shine on frequently used ABS caps can be permanent surface wear rather than dirt; more scrubbing will not restore texture.
Understand keycap wear before replacing parts
Polished tops, fading legends, chipped stems and edge cracks are different failures. Surface shine may be cosmetic while a cracked stem can loosen fit or damage during repeated removal. Compare high-use and low-use keys under the same light. Record when the change began and whether it affects function.
Replacement caps must match stem, profile, row shape, spacebar sizes, stabiliser positions and layout. A nominally standard set may not cover a compact right shift or unusual bottom row. Use the layout guide before ordering and keep original caps for warranty evidence.
Diagnose a key from software outward
Start with one repeatable test in the operating system and one trusted local or maker-approved tester. Disable macros and alternate layers, then compare another device or user profile where practical. Record missing, repeated or unintended registrations with frequency and connection mode.
Do not enter passwords or sensitive text into an unknown online tester. If only one application misbehaves, check its shortcuts and accessibility settings. If the fault follows the keyboard across devices, move to cable, socket, switch and board-level checks in the supported order rather than assuming firmware or switch failure.
Separate switch, stabiliser and socket symptoms
A normal-size key has a switch; larger keys may add stabilisers whose wire, housing or lubricant changes feel and sound. Rattle, binding, non-registration and double input are not interchangeable. Press different parts of the key slowly while disconnected to identify mechanical binding without generating electronic noise.
On a documented hot-swap board, a known-compatible switch exchange can isolate a fault, but inspect pin alignment and socket support first. Do not pull a soldered switch, force an incompatible pin pattern or repeatedly swap parts in a loose socket. A damaged hot-swap socket may need board repair, not another switch.
Protect cables, ports and wireless power
Inspect detachable cable plugs, strain relief and port movement. Test a known suitable direct connection before adding a hub, extension or switch. Our USB hub guide helps isolate bandwidth, power and cable paths even though keyboards normally require less data than cameras or storage.
For wireless boards, record battery condition, charging behaviour, receiver location and radio mode. Stop at swelling, heat, smell, damaged insulation or liquid near power components. Do not replace a sealed battery without an approved service method and competent handling.
Treat firmware as a controlled maintenance event
Use only the exact maker support page and hardware revision. Save the current configuration where supported, read release notes and keep power and connection stable. Do not flash community firmware merely to solve an unproven hardware symptom; incompatible firmware can create a second fault and complicate warranty evidence.
After an update, test the default profile before restoring complex remaps. Record version, time and result. If the board is unsupported and required configuration software no longer runs safely, compare a supported offline mode, repair path and replacement. The review-reading guide helps separate another revision’s reports from your exact board.
Decide between spare part, repair and replacement
A cap set, cable or supported switch can be a proportionate repair when the board and support remain sound. PCB corrosion, damaged sockets, inaccessible batteries, unavailable proprietary caps or failed controllers require a different assessment. Price parts, tools, labour, shipping and the risk of losing settings.
Use the ownership-cost guide, but include downtime and compatibility. A cheap new board may create layout or software waste; an expensive repair may still be sensible for a well-supported durable chassis. Do not let purchase price justify unsafe electrical work.
Preserve evidence before opening or modifying
Photograph the complete board, serial label, cable, fault map and test result. Save purchase proof and maker correspondence. Check whether removing caps, switches or screws affects the service route; do not assume a warranty sticker settles every legal question, but recognise that unauthorised damage can complicate diagnosis.
Use the purchase-evidence guide and faulty-goods guide before a risky repair. If liquid, heat, smoke, exposed conductors or battery damage is involved, stop and seek competent service rather than reproducing the fault.
Owner maintenance or professional repair?
The manual supports the exact task
The board is disconnected, parts are identified, cleaning is surface-level or a documented modular replacement can be reversed safely.
Power, solder, liquid or board damage is involved
A battery, PCB, hot-swap socket, connector, corrosion or unsupported disassembly needs appropriate tools and competence.
Balanced verdict
Mechanical keyboards reward records and controlled diagnosis more than aggressive cleaning. Map the layout, disconnect power, use the maker’s material guidance and isolate software, cable, cap, stabiliser, switch and board in order.
Use the linked buying, layout, USB and evidence guides for the stages outside routine owner care.
Official checks:
Microsoft official keyboard cleaning guidance ↗
UK product safety alerts and recalls ↗
UK consumer product safety guidance ↗
Frequently asked questions
Can every mechanical keyboard switch be replaced?
No — Some are soldered, some use specific hot-swap sockets and some are optical or proprietary. Verify the exact model and revision before removal.
Can I wash mechanical keyboard keycaps?
Only if the maker supports removal and the cap material and legend method tolerate the stated cleaning process. Dry fully before refitting.
Does a shiny keycap need replacing?
Not necessarily — Shine can be cosmetic surface wear. Replace when fit, legibility or comfort no longer meets the need, not to repair an unrelated switch fault.
How do I test a repeating key safely?
Use a trusted local or maker-approved tester with nonsensitive input, disable remaps and compare devices or profiles. Record frequency and conditions.
Should I lubricate a noisy switch?
Not without model-specific competence and a clear diagnosis. Noise may come from a stabiliser, case, cap or switch; excess lubricant can contaminate contacts or sockets.
Methodology and limitations
We reviewed current Microsoft official keyboard-cleaning guidance and UK product-safety routes on 2 September 2026. We structured the routine around model identification, disconnection, layout mapping, material-safe cleaning, layered diagnosis, modularity evidence and repair limits. We did not dismantle, electrically test or long-term wear-test a keyboard.
Limitations
Keyboard construction, cleaning chemistry, firmware, batteries, warranties and spare parts vary. Follow the exact maker manual and competent repair guidance. This article does not authorise soldering, battery work or liquid-damage recovery.